¶ 1. Prerequisites and Safety
[!CAUTION]
Mandatory Professional Installation: This procedure involves handling high-voltage household wiring and must be performed by a certified electrician to prevent fire, electric shock, or death.
¶ 1.1 Required Components (Not Included)
- Insulating Gloves: Must be provided by the electrician.
- 16A Circuit Breaker: One unit is required for each SolarFlow 1600 AC+ main unit.
- Multimeter: For verifying the absence of voltage.
- Standard Electrical Tools: Screwdrivers, wire cutters, and wire strippers.
¶ 2. Installation Sequence
Step 1: Safety Preparation
- The electrician must wear insulating gloves before commencing work.
- Turn off the main household switch and the relevant branch circuit protection switches.
- Critical: Use a multimeter to verify that there is no voltage at the terminals before proceeding.
Step 2: AC Cable Modification
- Use a cable cutter to remove the standard plug from the provided 3m 16A AC Power Cable.
- Strip the outer insulation to expose the three internal wires: L (Live/Brown), N (Neutral/Blue), and PE (Ground/Yellow-Green).
- Strip the insulation from the tips of the three wires to expose the copper.
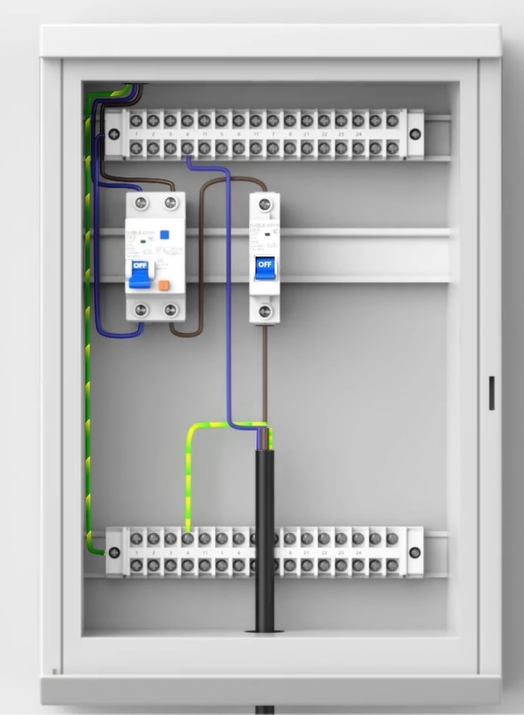
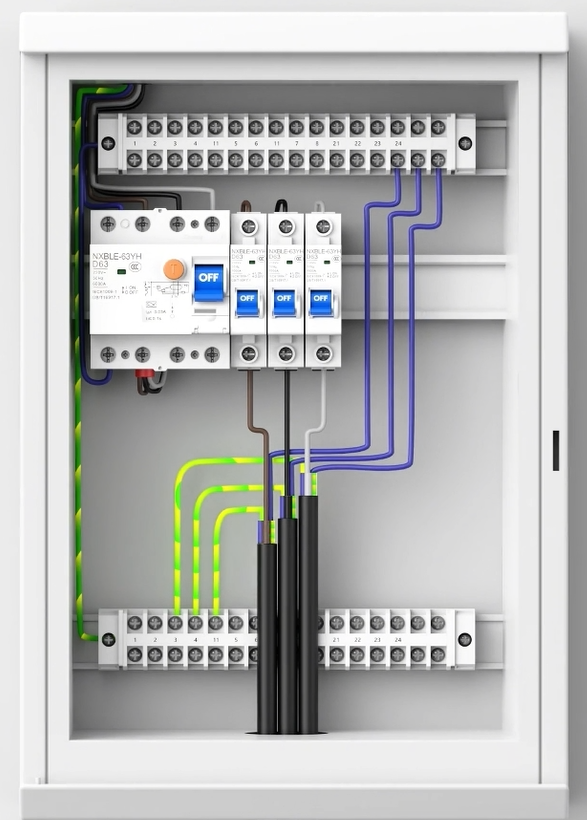
Step 3: Distribution Box Wiring
- Mount the Breaker: Install the new 16A circuit breaker onto the DIN rail inside the distribution box.
- Live (L) Connection: Connect the Brown (L) wire from the AC cable to the bottom of the new 16A circuit breaker.
- Neutral (N) Connection: Connect the Blue (N) wire to the neutral bar in the household panel.
- Ground (PE) Connection: Connect the Yellow-Green (PE) wire to the ground bar in the household panel.
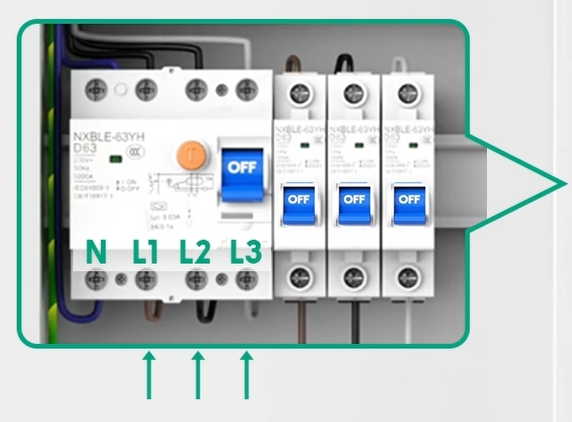
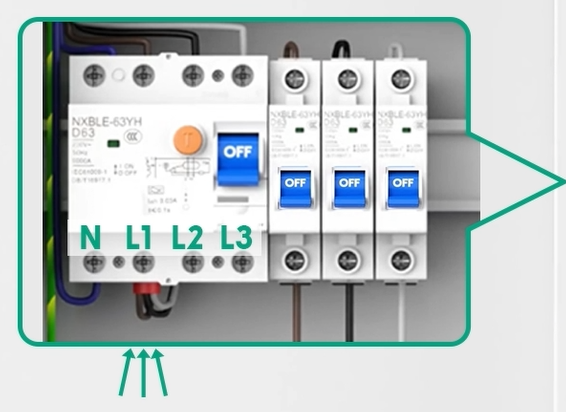
¶ Single-Phase Installation Diagram for SolarFlow 1600 AC+ (Single/Multiple Units)
| Wiring diagram the distribution box | Display | Please note | |
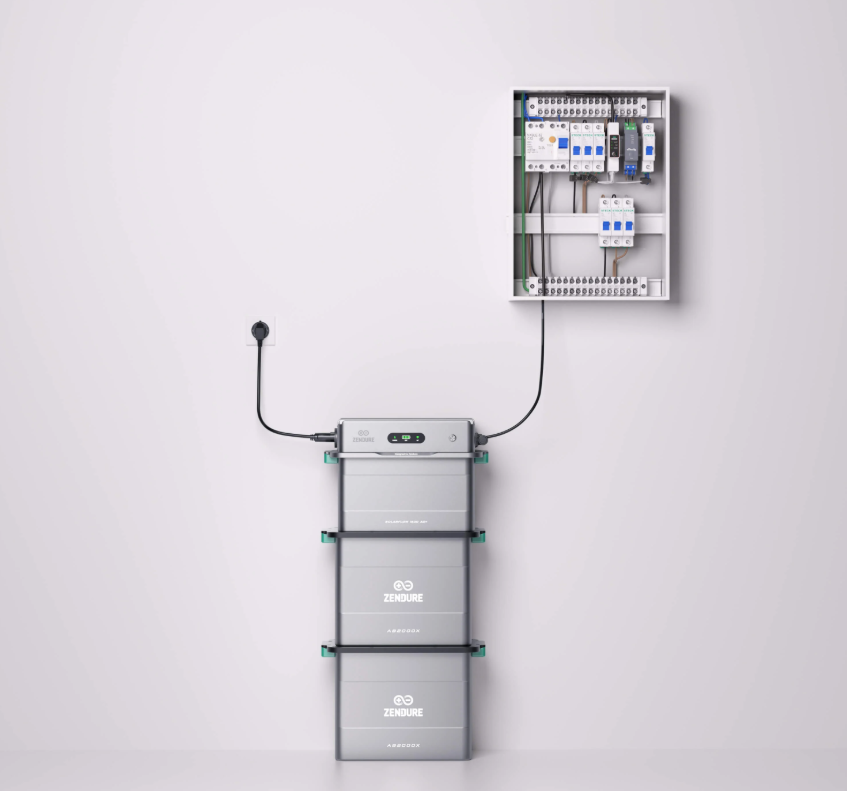
| Single Unit |
 |
 |
|
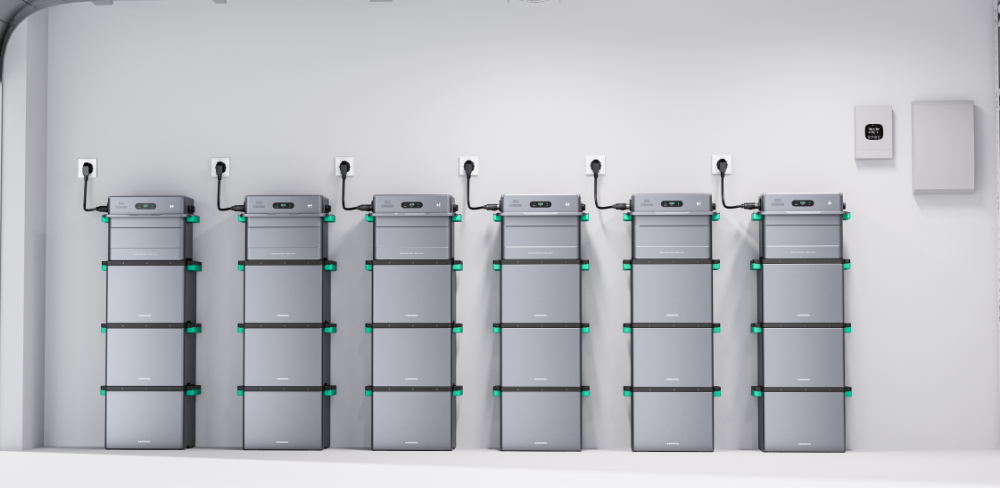
| Multiple Units |
 |
 |
|
¶ Three-Phase Installation Diagram for SolarFlow 1600 AC+ (Single/Multiple Units)
| Live (L) Connection Methods | Wiring diagram in the distribution box | Display | Please note | |
| Single Unit | / |
 |
|
|
| Multiple Units |
|
 |
|
|

|
||||
|
Step 4: System Restoration
- Securely close and restore the distribution box panel.
- Turn on the main household switch and the new 16A circuit breaker.
- Plug the specialized connector end of the AC cable into the AC Port of the SolarFlow 1600 AC+.
- Press and hold the button on the main unit for 2 seconds to power on.
¶ 3. Unlocking 1400W/1600W Output
By default, the system output is capped at 800W for standard socket safety. To enable the 1400W/1600W Premium mode:
- The electrician must verify that the wiring can safely handle the increased load.
- Open the Zendure App and navigate to Device Settings > On-grid Setting.
- Apply to increase the power limit.
- Sign the digital Safety Agreement within the app confirming professional installation.
Next Step: Once connected, you can configure your Base Load and Charging Settings to manage energy flow for high-power appliances like heat pumps.